

Introduction
Hello and welcome back! Today, I am going to walk you through the DSYM challenge from the website HackTheBox. My intended audience for my walkthroughs are noob reverse engineers like myself. Therefore, I tend to be verbose in my walkthroughs. If you prefer, you can watch my corresponding YouTube video for this walkthrough here:
Optional Materials to Follow Along
If you want to follow along feel free to download the VM I provide. You can find instructions on importing the VM here. If you don't want to use my VM that's fine, my feelings won't be shattered. But you will at least need the binary. You can download the binary here. The binary comes in a password protected zip file. The password is hackthebox.
Note: You will need a valid HackTheBox account to download the binary.
You'll also need the elfutils package. Install it with sudo apt install elfutil. Finally, you'll need a disassembler. I recommend IDA or Ghidra. With all of that out of the way, let's get reversing!
Initial Triage
As discussed in my previous blog post, when reversing, I start by running the file command. If you want a more detailed overview on what the commands I run in my initial triage, you can see this blog post for more information. This challenges comes with two binaries: dunnoWhatIAm and getme. We can run file on both by running file dunnoWhatIAm getme which provides the following output:

Both binaries are 64-bit but one of them has debugging information and isn't stripped while the other is stripped. Notice the dunnoWhatIAm binary does not have an interpreter. This means this binary is not executable. Meaning it only contains debugging information and no executable instructions. Also note, the sha1 hash is the same for both binaries. What that leads me to believe that dunnoWhatIAm holds the debugging symbols for getme. To aid our analysis later, we can use the eu-unstrip command to add the executable parts to the dunnoWhatIAm binary. Run the following command:
eu-unstrip getme dunnoWhatIAmNow when we run file on the dunnoWhatIAm binary you'll see the interpreter is no longer empty as it was before so it is now executable.

Before running the binary, let's look at the symbols with the nm command.
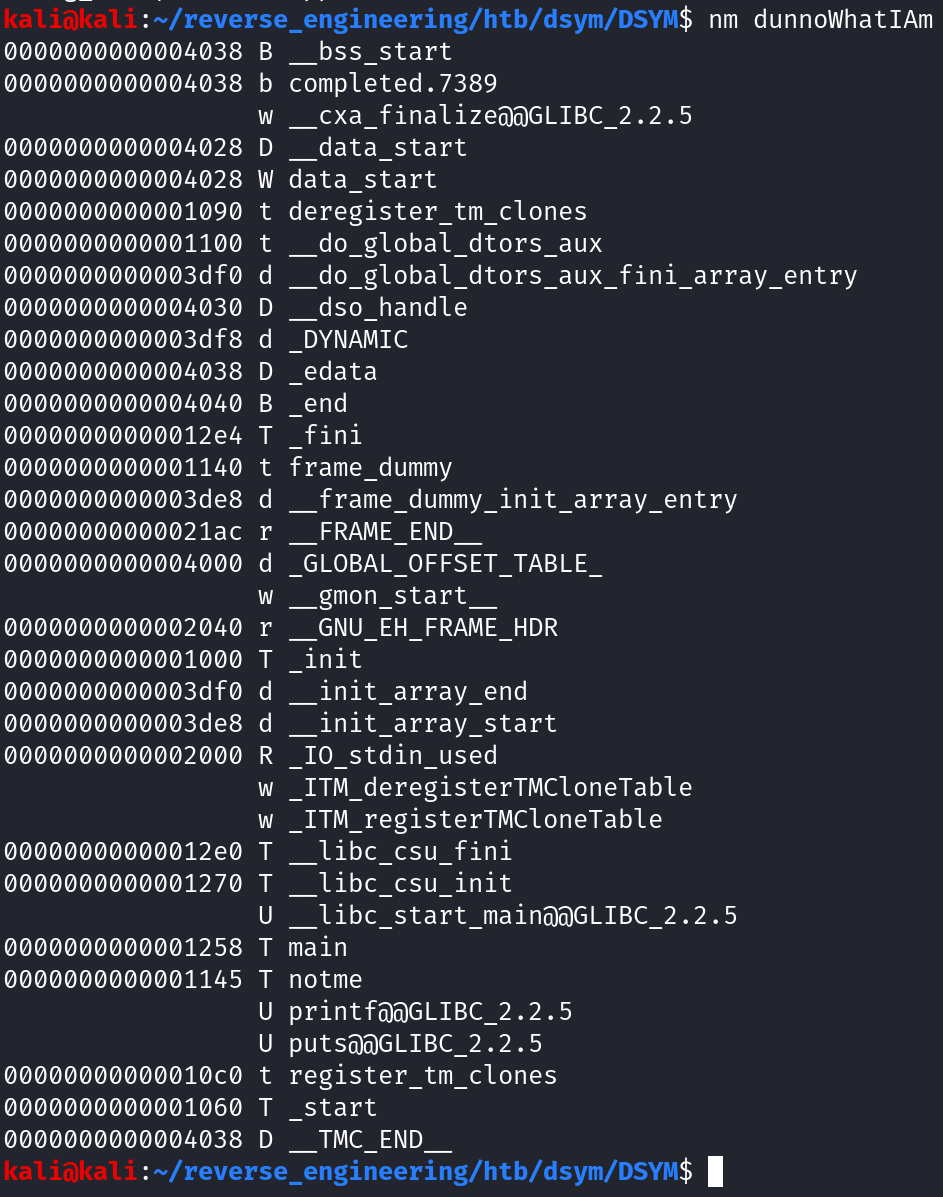
There's only one user-defined function other than main, notme. This doesn't provide any additional insight how the program works so let's run strings.
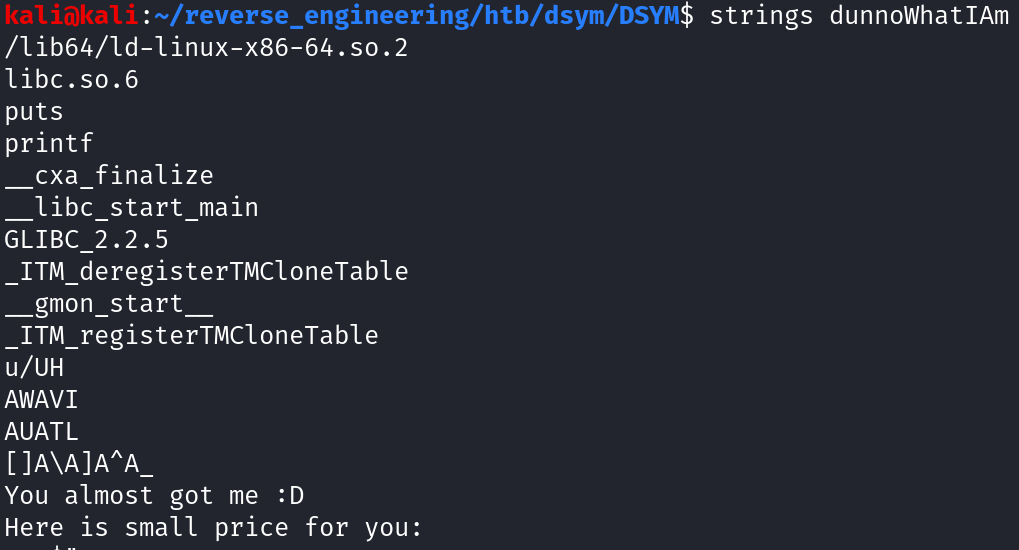
We see two possible outputs of the program: "You almost got me :D" and "Here is small price for you:". While this is interesting, we still do not have a clear idea how to solve this challenge or any additional insight into how the program works. Let's just run the program and see what happens.

As you can see, nothing happens. We can check the output of the original getme binary to ensure we didn't break anything but nothing happens when we run that binary either. So let's go ahead and open this up in Ghidra. We're going to open dunnoWhatIAm because it has debugging symbols.
Analysis in Ghidra
If you're using the VM I provided you can simply type ghidraRun from the command line and it'll open Ghidra. If not, you will have to execute the ghidraRun binary in the ghidra_version_number_PUBLIC directory.
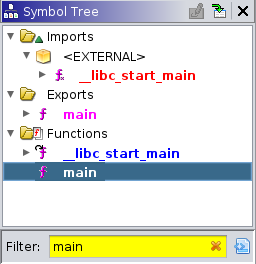
For complete instructions on setting up a project you can checkout this blog post. Select the default analysis options when Ghidra asks. Once you have Ghidra loaded navigate to the main function by typing "main" in the filter bar in the symbol tree.
Once you're at the main function you should notice that this function does absolutely nothing lol.
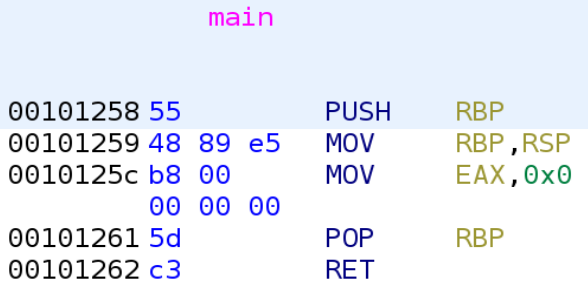
If we were to translate this to C it would literally look like this:
int main()
{
	return 0;
}
That's it! That's the main function. So when we ran the binary earlier, it makes sense we didn't get any output. If you recall, there is another function in this binary notme. Let's take a look! You can easily get there by typing "notme" in the filter just as we did earlier.
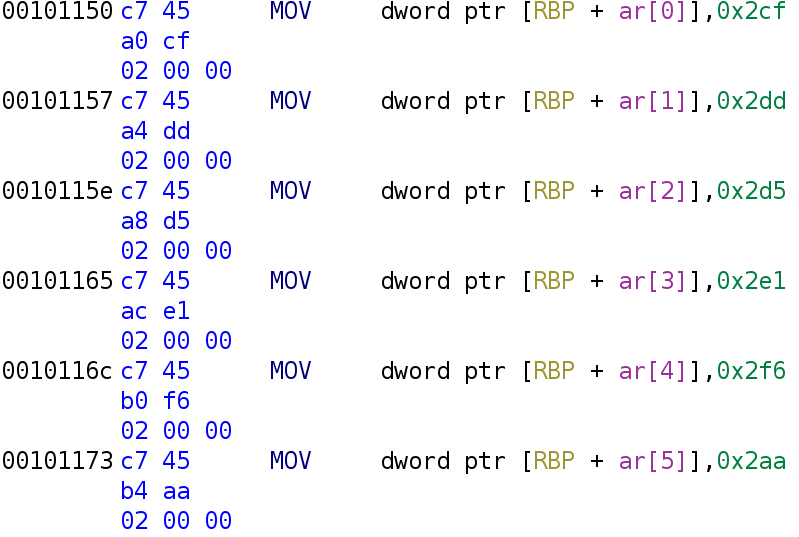
The first part of the binary is simply initializing the ar integer array (gotta love debugging symbols!):
Scroll down past this and you'll get to the rest of the notme function.
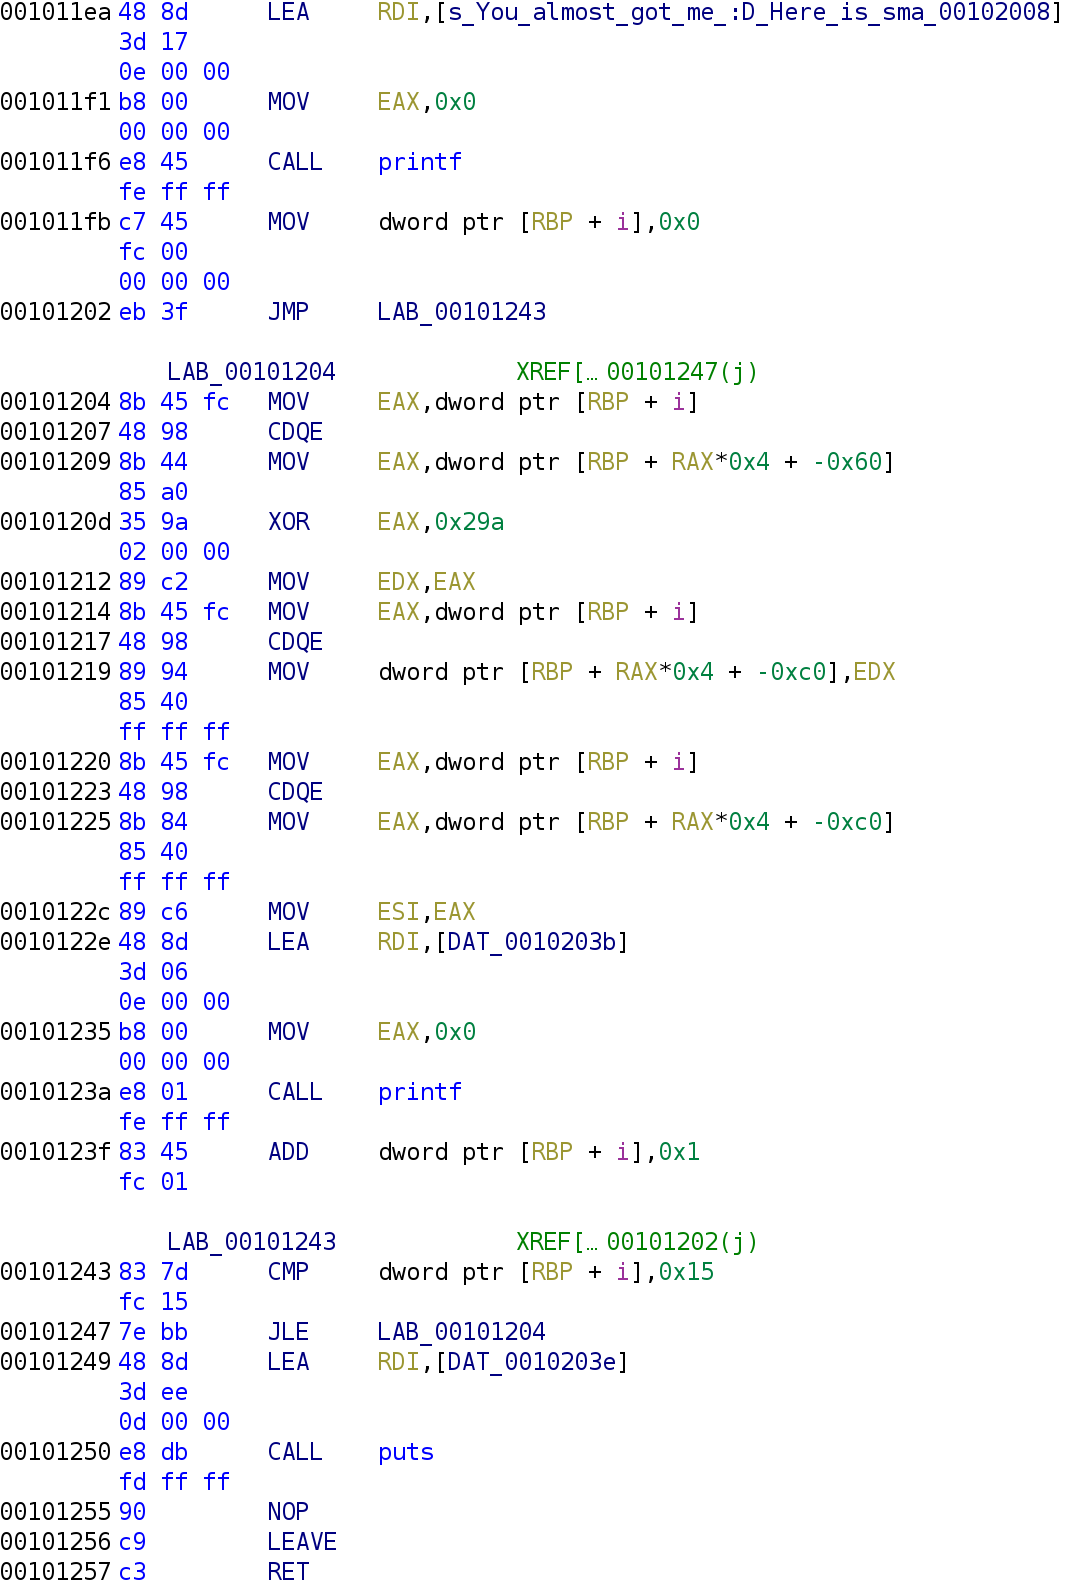
notme function continuedThis part of the function first prints one of the messages we saw in the strings output earlier: "You almost got me :D\n Here is a small price for you." We then see the variable i is set to 0 and the control flow changes to LAB_00101243. You'll often see this type of behavior during your analysis. This is the beginning of a loop. If you follow the JMP LAB_00101243 instruction you'll see at address 00101243 the variable i is compared to 0x15. If i is less than or equal to 0x15, we jump to LAB_00101204. This is the meat of the loop so let's take a closer look.
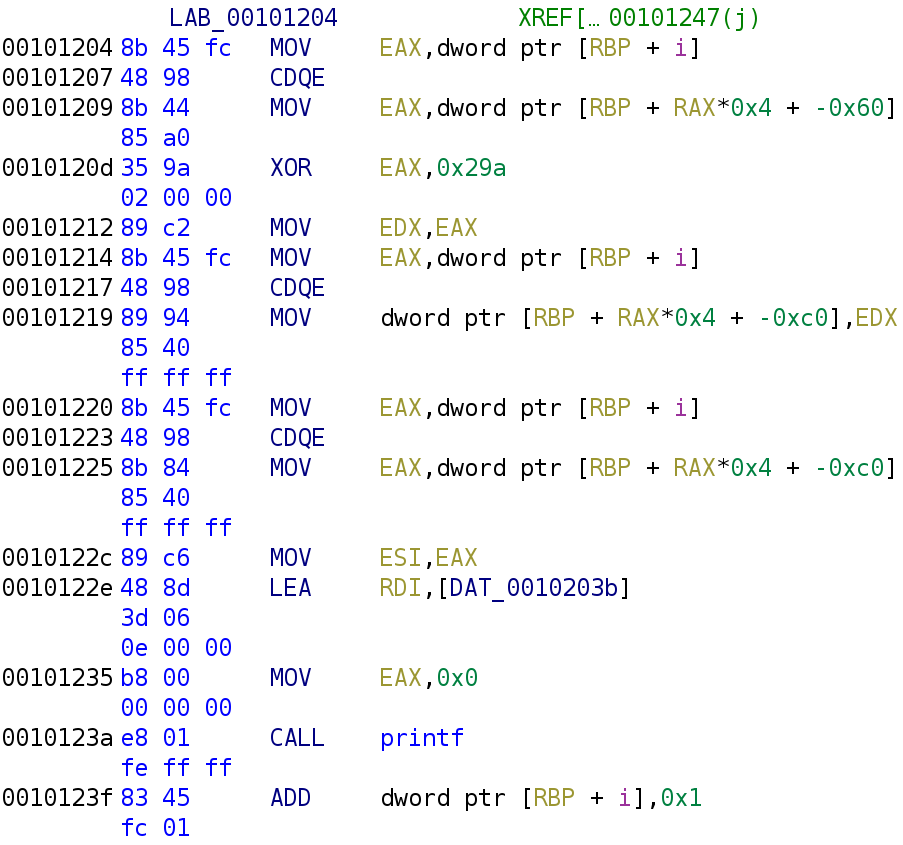
notme functionThe first instruction simply stores i in the EAX register. The CDQE instruction simply extends a 32-bit register (the EAX register in this case) to 64-bits and places the result in the 64-bit register equivalent (in this case RAX). So, if i has the value of 1 EAX would have 00000000000000000000000000000001. That's 31 0's before the 1. CDQE pretty much prepends 0's so it fills up it's 64-bit register equivalent RAX.
A Brief Diversion: Array Indexing in Assembly
If you're already familiar with how arrays are indexed in assembly feel free to skip to the next section.
The next instruction, EAX, [RBP + RAX*0x4 + -0x60], may look a little confusing, but it really isn't. I'll break it down for you! This is simply grabbing the ith value in the array, ar, and storing it in the EAX register. This is usually how you will see arrays indexed in assembly. RAX is used as the index. We multiply by 4 because this is an integer array. Integers are 4 bytes long, so if our array starts at memory address 0x00000000, the next element in the array will be at address 0x00000004, and the next element at address 0x00000008, and so on. In our case, the array, ar starts at address RBP - 0x60. So the first element is stored at address RBP + 0x0*4 - 0x60 and the next element is at address RBP + 0x1*4 - 0x60. You can verify the array starts at address RBP - 0x60 by clicking on the first time when the array is assigned a value at address 0x00101150 and pressing Ctrl+Shift+G. This is a shortcut for patching instructions in Ghidra. Although we will not patch the instruction, it will allow us to see the raw assembly. If you see the warning below just hit ok.
After you press ok, you should see this:
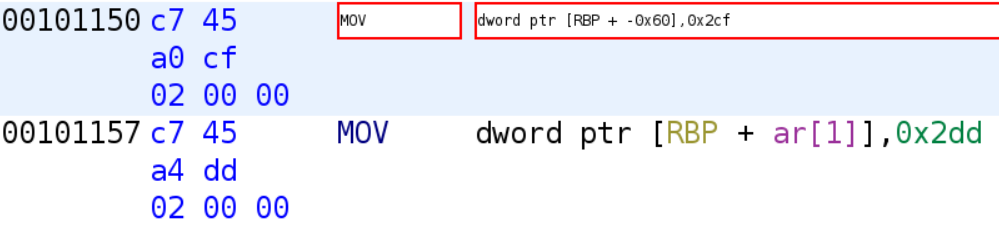
As you can see, the first element of the array is indeed at RBP - 0X60 as discussed earlier.
Back to the Challenge
notme functionAt this point, the value ar[i] is stored in the EAX register. At address 0x10120d, EAX is XORed with 0x29a and the result is stored in EAX. So, EAX holds ar[i] ^ 0x29a. Lines 0x101212 through 0x101219 take the result of ar[i] ^ 0x29a and store it in the ith index of another array whose base is RBP - 0xC0 we will call this new_array. Lines 0x101220 through 0x101235 setup the call to the printf function. This is something we discussed in a previous blog post. At address 0x10122e, we see this strange DAT_0010203b being loaded into the RDI register. In Ghidra, strings have to be at least 5 bytes long to be displayed as a string. If a string is less than 5 bytes, Ghidra will place a reference to where the string is stored and represent it as DAT_some_address as you see in the example above. You can view what this string is by double-clicking on the reference.

As you can see, the string is %x, a format specifier for displaying hexadecimal values. The disassembly of the notme can be represented by the following C code.
int i = 0;
while (i <= 0x15)
{
	new_array[i] = ar[i] ^ 0x29a;
    printf("%x", new_array[i]);
    i++;
}
Ok we know what the code does but what now?
If you recall, the function notme is never called in the main function. In fact, nothing happens in the main function! So, how do we use this new information about the notme function? I'm going to turn to our good friend gdb. Open the binary in gdb by typing gdb ./dunnoWhatIAm. Next set a breakpoint at the main function by typing b main.

Finally, run the program by typing r and hit enter. If you're using gdb with gef it should look like this:
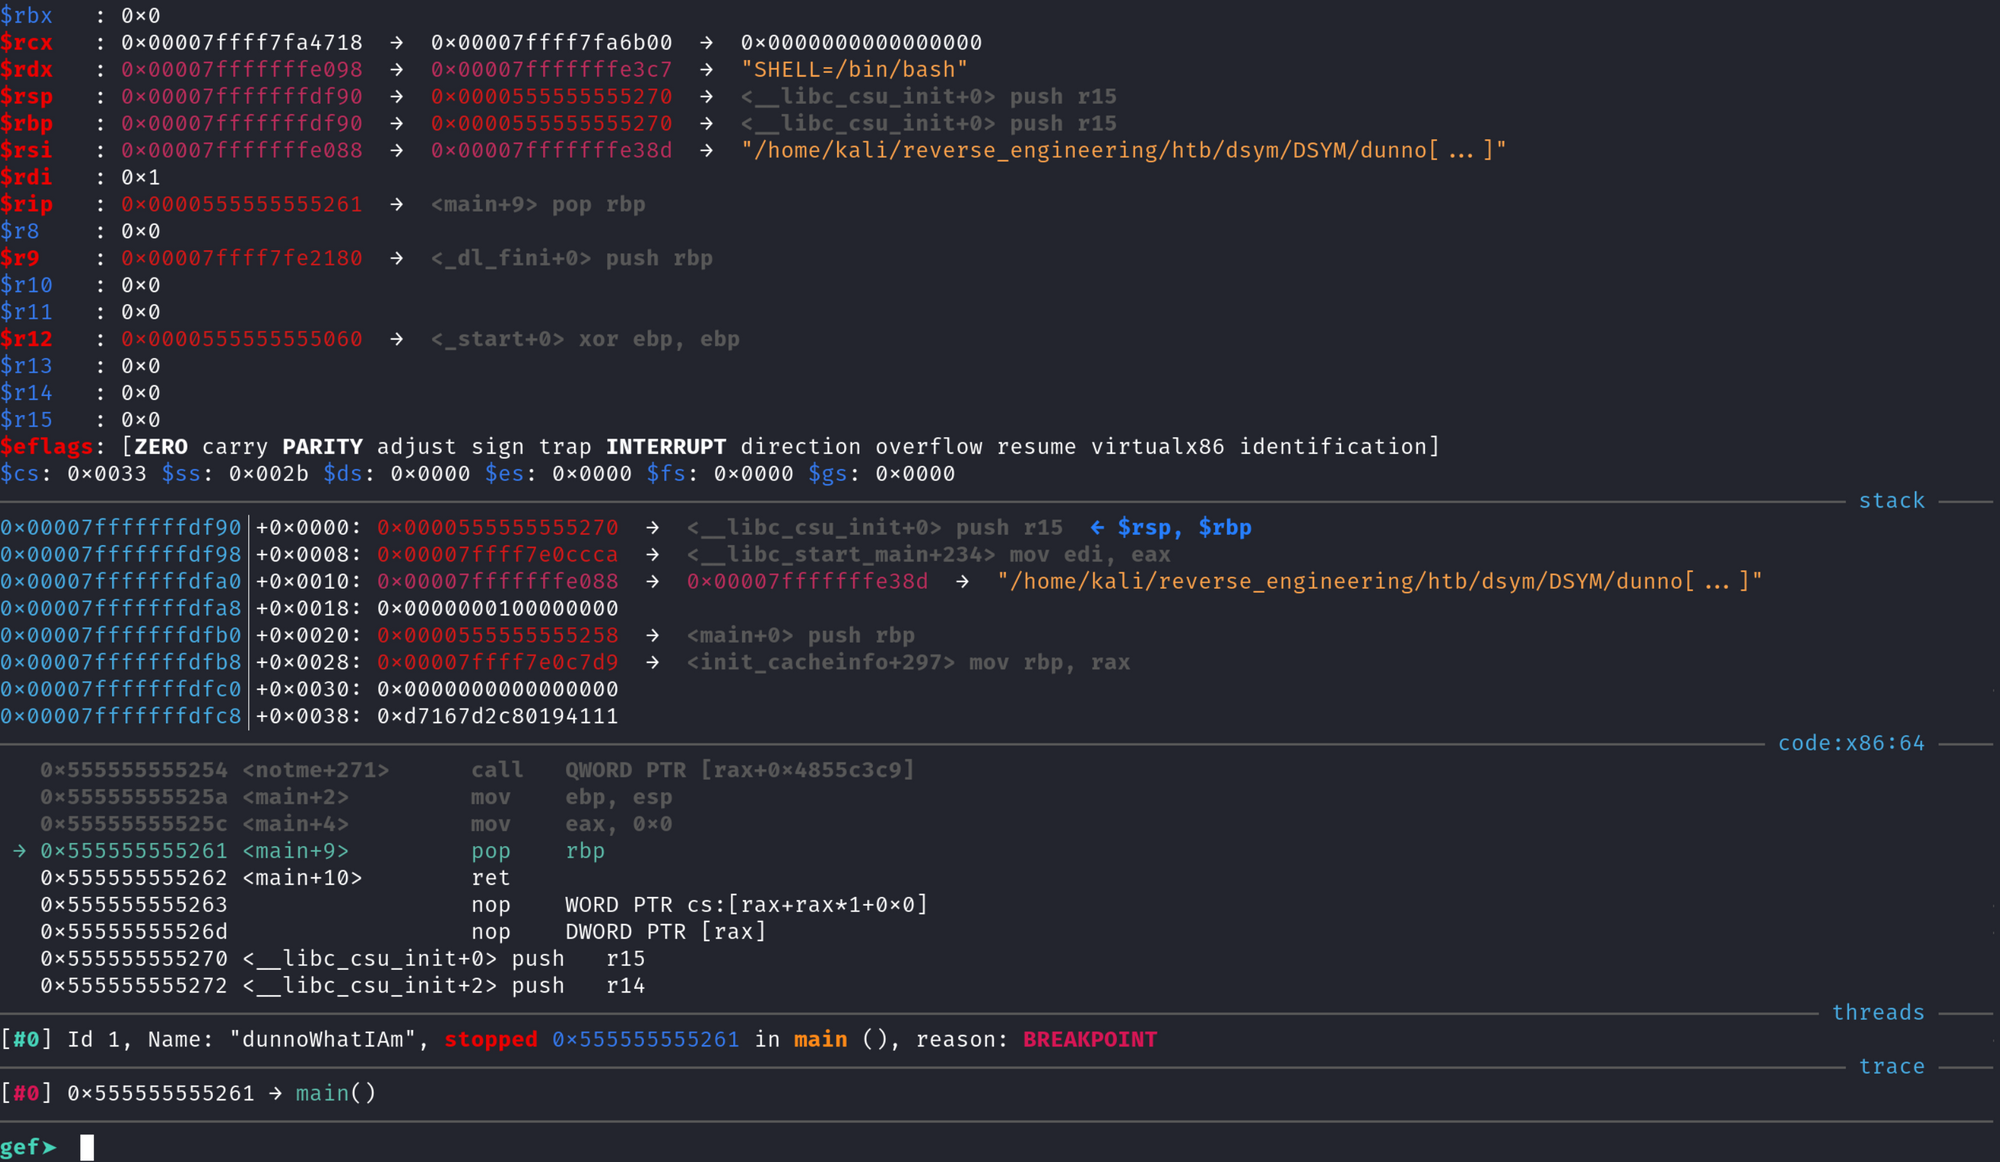
If you aren't using gef, you'll see a message saying "Breakpoint 1..."
If you recall, the main function does absolutely nothing but the notme function takes an array and XORs the values in the array by 0x29a, stores the result in a new array, and prints out the new array in hexadecimal format. So, how do we execute the noteme function? The easiest way I know of, is to set the value of the RIP register to the address of the notme function. The RIP register is very important. It holds the address of the next instruction that will be executed. If you're familiar with exploitation you'll know the goal of buffer overflow attacks, is to gain control of the RIP register to execute code of your choosing. However, that is a discussion for another day. For now, just know that RIP points to the next instruction to be executed by the CPU. gdb allows us to modify the value of any register using the set command. Type set $rip = ¬me. To verify the changes went through type info registers and you should see the register RIP now has the address of the first instruction in the notme function.
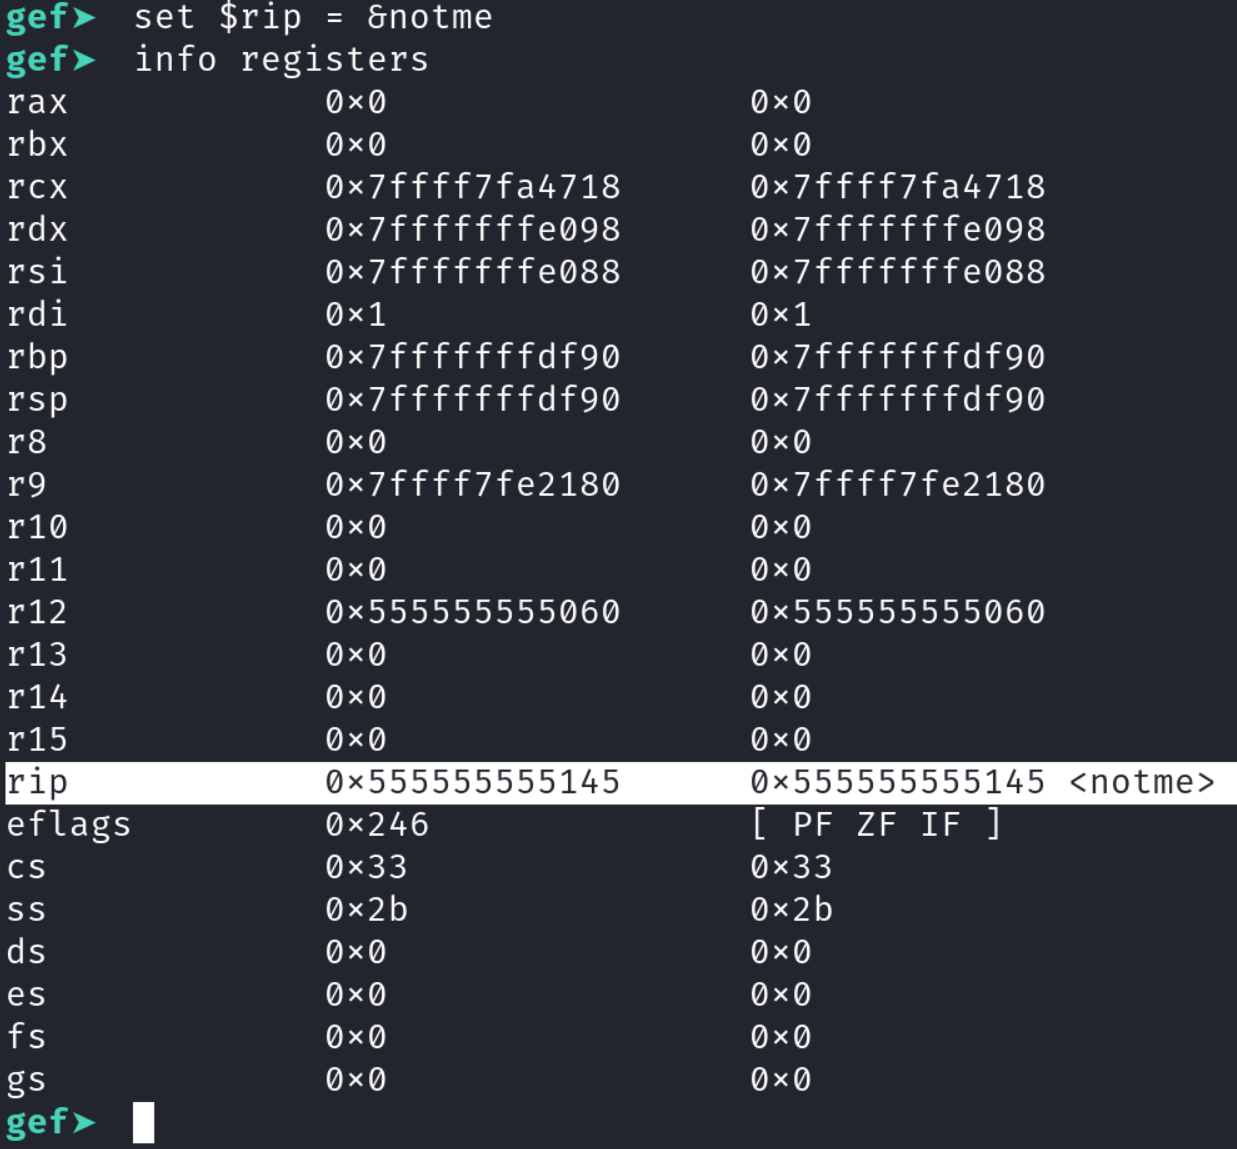
RIP register to the address of the notme functionThis is great! We have successfully changed the execution flow of the program! Luckily, the author did not add any anti-debugging techniques, so we can simply type continue or c.

notme functionAs you can see, we successfully ran the function and we see the message we saw earlier when we ran strings. We are close to wrapping this thing up! We see that we are presented with a series of letters and numbers. If you recall, the format specifier the author used was %x which prints out hexadecimal characters. Since we know that these are hexadecimal values, we can easily translate them alphanumeric characters. The following one liner will do the trick:
echo 55474f7b6c30685f65333479796c5f7430675f7a337d | xxd -r -pRunning the command should give you the following output:

Ooh we are REALLY getting close now! If you've ever done a challenge on HackTheBox, you'll know flag submissions follow this format: HTB{<some_flag>}. With this in mind, let's see the relationship between UGO and HTB. The distance from U to H is 13. Similary, the distance from G to T is also 13 and the last character follows this distance. Let's apply this to the other letters in the rest of the string we received. I wrote a simple Python script to do this.
Disclaimer: I am not the best programmer but this script gets the job done and that's all I really care about lol. You have been warned.
enc_flag = "UGO{l0h_e34yyl_t0g_z3}"

def decrypt(flag, key):
        dec_flag = ""
        for x in flag:
                if x.isalpha() and x.isupper():
                        dec_flag += chr((ord(x) + key - 65) % 26 + 65)
                elif x.isalpha() and x.islower():
                        dec_flag += chr((ord(x) + key - 97) % 26 + 97)
                else:
                        dec_flag += x
        print dec_flag

if __name__ == '__main__':
        key = 13
        decrypt(enc_flag, key)
If you run this script you should receive the flag!

Conclusion
Alright that's it for this challenge! I hope you learned something new and enjoyed reading this post. Feel free to check out my YouTube channel and/or other blog posts! If you have any questions feel free to reach out to me on Twitter, Instagram, or Discord: jaybailey216#6540. If you have a challenge you would like me to try, let me know and I'll give it a shot! I'll see you all next time!
Peace out! ✌🏾