

Introduction
In this blog, I'll demonstrate how to setup a Ghidra project so you can analyze binaries.
To start Ghidra, you have to execute the ghidraRun binary in the ghidra_X.X.X_PUBLIC folder where X.X.X represents the version of Ghidra you have installed. However, if you're using the VM I provided, you can simply type ghidraRun from any directory and that'll launch Ghidra.
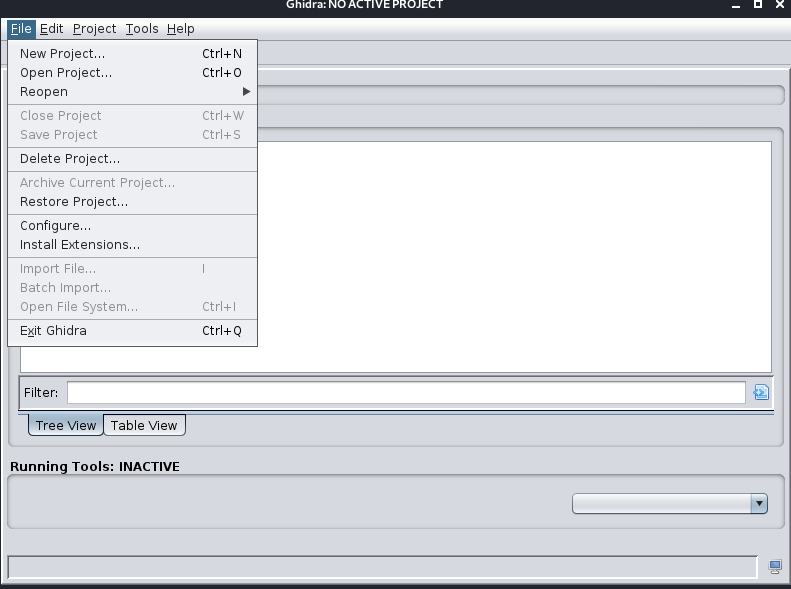
After it has started we have to create a new project. To start a new project, press File->New Project or Ctrl+N.
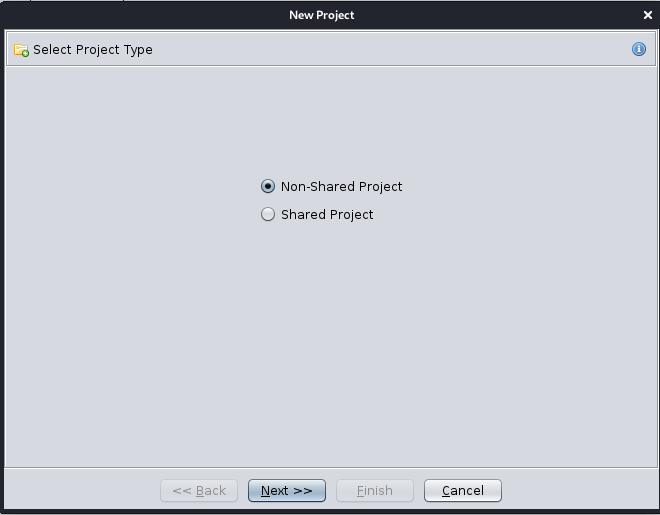
One of the most powerful features Ghidra has is the ability to collaborate with others on a reverse engineering project. This is very useful for teams who are working a large binary. This allows them to share information about the binary such as custom function names, data types, etc. easily and efficiently. However, we are going to work solo so select Non-Shared Project.
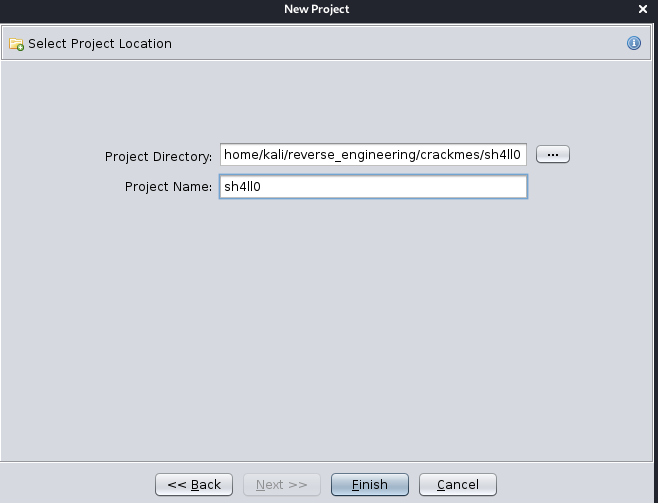
Give your project a name, select a directory, then hit Finish. I always store my Ghidra projects in the same directory as the binary I'm analyzing. I'm not sure if this is best practice or not it's just something I've always done.
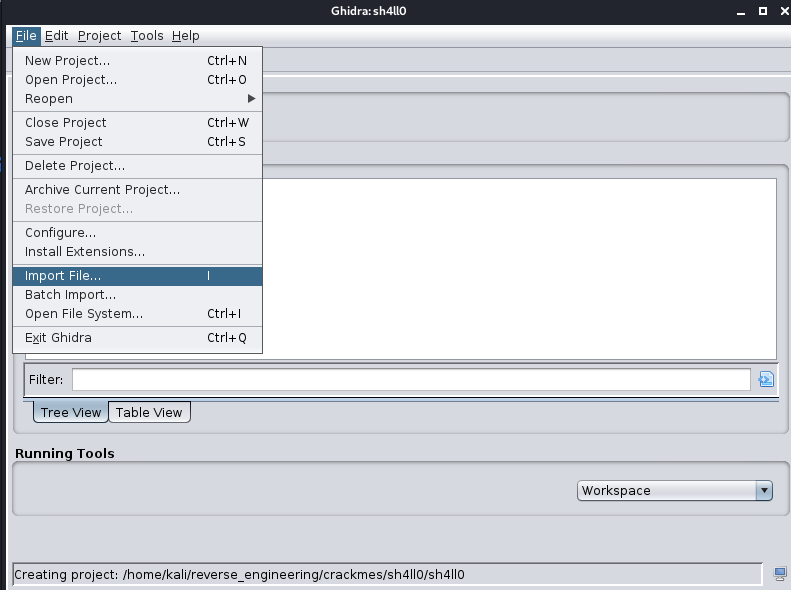
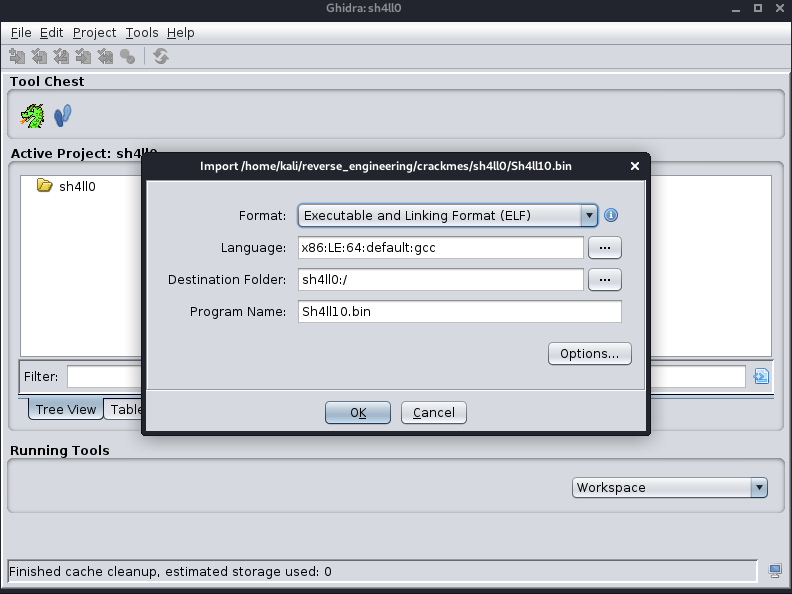
At this point, the project has been created and a folder structure should have been created. Now we have to import a binary. To do so, navigate to File->Import or just press the i key. I'm going to use the sh4ll0 binary from a previous blog post.
Navigate to the location of your binary file and import it. It's going to ask you to verify information about the binary. Although you can usually just press "ok" here it never hurts to double check. In this example, we are importing a 64-bit binary. Additionally, the language was C so we can just press "Ok"
Finally, you'll see the import results summary. Similarly, this is usually fine but double checking never hurts. If anything looks off you should go back to the previous step and change the import options. However, in this case, everything looks fine so I'm going to hit "Ok."

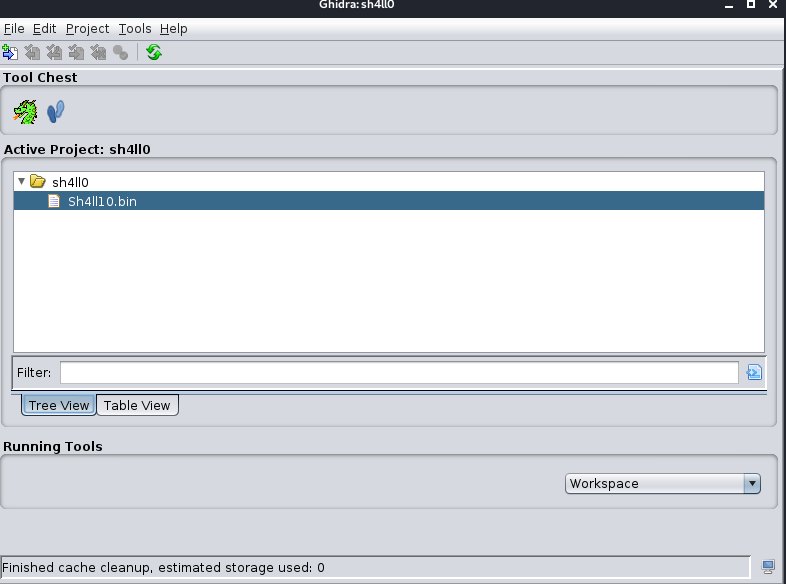
Alright now the file has been successfully imported into our project. Simply double-click on the binary name and Ghidra will load it.
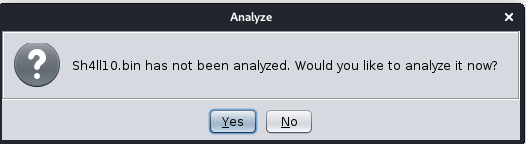
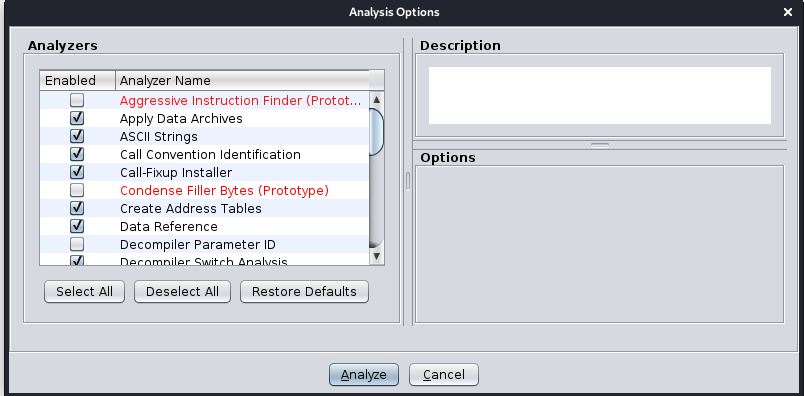
Now it's going to ask if you want to Analyze the binary. Once you select yes it will ask you for the analysis options. As of writing this post, I have never had to modify the analysis options. The default options should work just fine so just hit "Analyze."
Now the binary has been analyzed, we can begin doing your analysis.
That's it! Your binary has been loaded in Ghidra! You can load more than one binary into Ghidra. You simply just import another binary file and Ghidra will happily load it for you! Have fun reversing!
I'll see you all in the next one!
Peace out! ✌