

Introduction
Hello and welcome back! In this blog post we will solve a fairly simple reverse engineering challenge that exposes us to the dreaded SIMD instructions. These are instructions used in floating point operations among other things. Luckily this challenge wasn't too difficult even with these crazy instructions. If you prefer to watch YouTube videos you can check out my corresponding walkthrough below.
Optional Materials to Follow Along
If you want to follow along you can download my VM. The binary will be in the /home/kali/reverse_engineering/crackmes/sh4ll2 directory. Of course you don't have to use my VM, but you will need the binary. You can download that here. It comes in a password protected zip file. The password is "crackmes.one" without the quotes. You might also want a disassembler. I suggest IDA or Ghidra. I'll be using Ghidra throughout this tutorial. With all of that out of the way let's get reversing!
Initial Triage
Let's start out with running file on the binary.

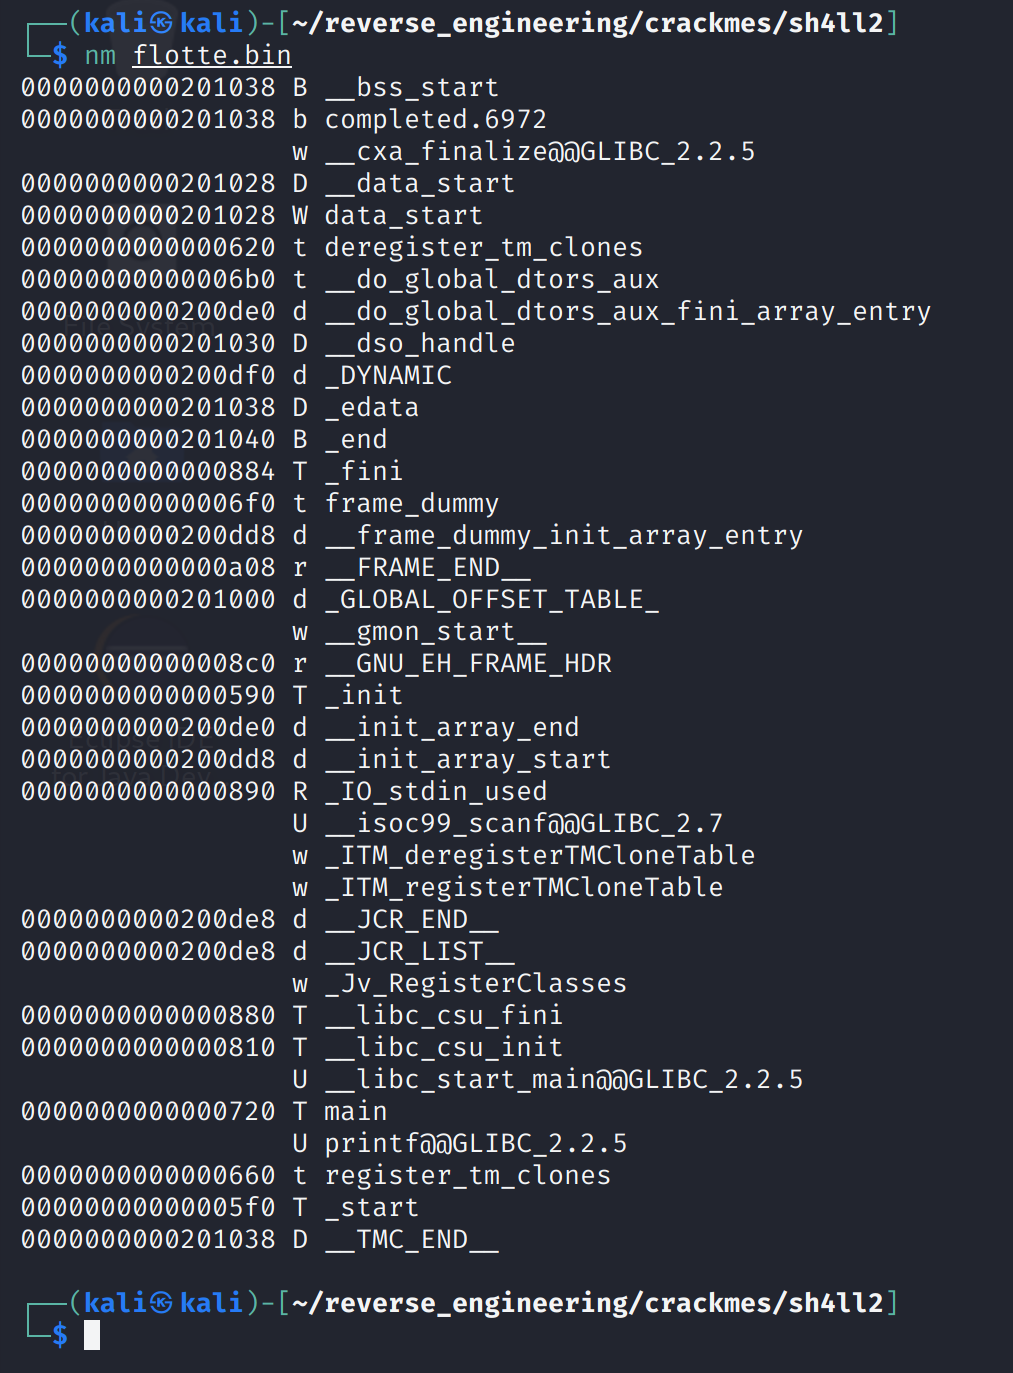
The binary is 64-bits, dynamically linked, and not stripped. We always like seeing binaries that aren't stripped so let's go ahead and look at the symbols with the nm command.
There isn't much going on here. A lot of this stuff is standard C stuff. We do see the main function but that's not too interesting, every C/C++ program has a main function lol. So, the last step is to run strings.
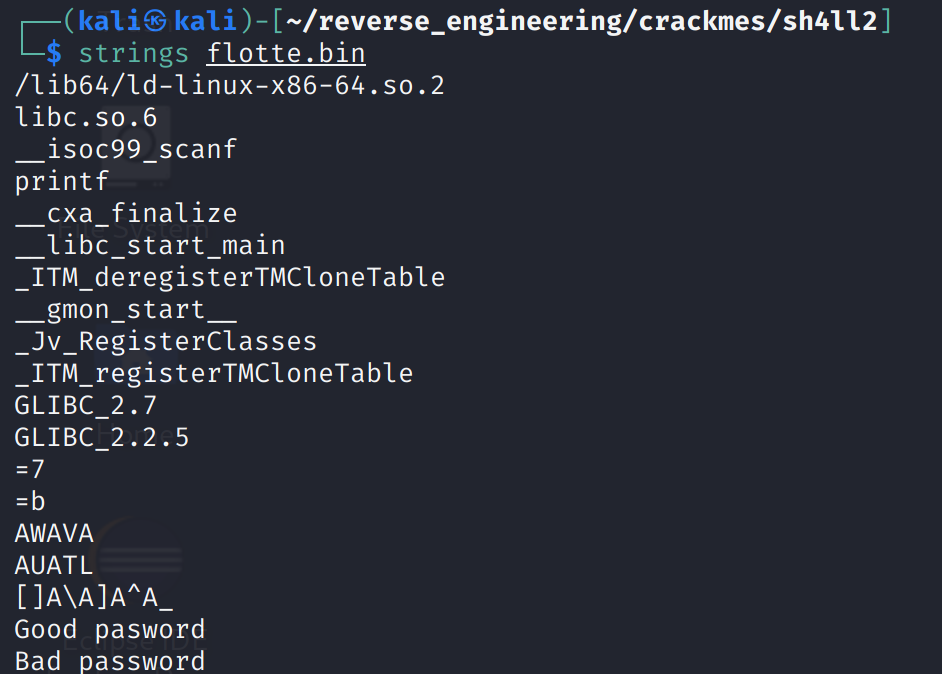
Again nothing too interesting. We see the "Good password" and "Bad password" strings which appear to be the only output the program gives. Now, without further ado, let's open the binary in Ghidra!
Static Analysis in Ghidra
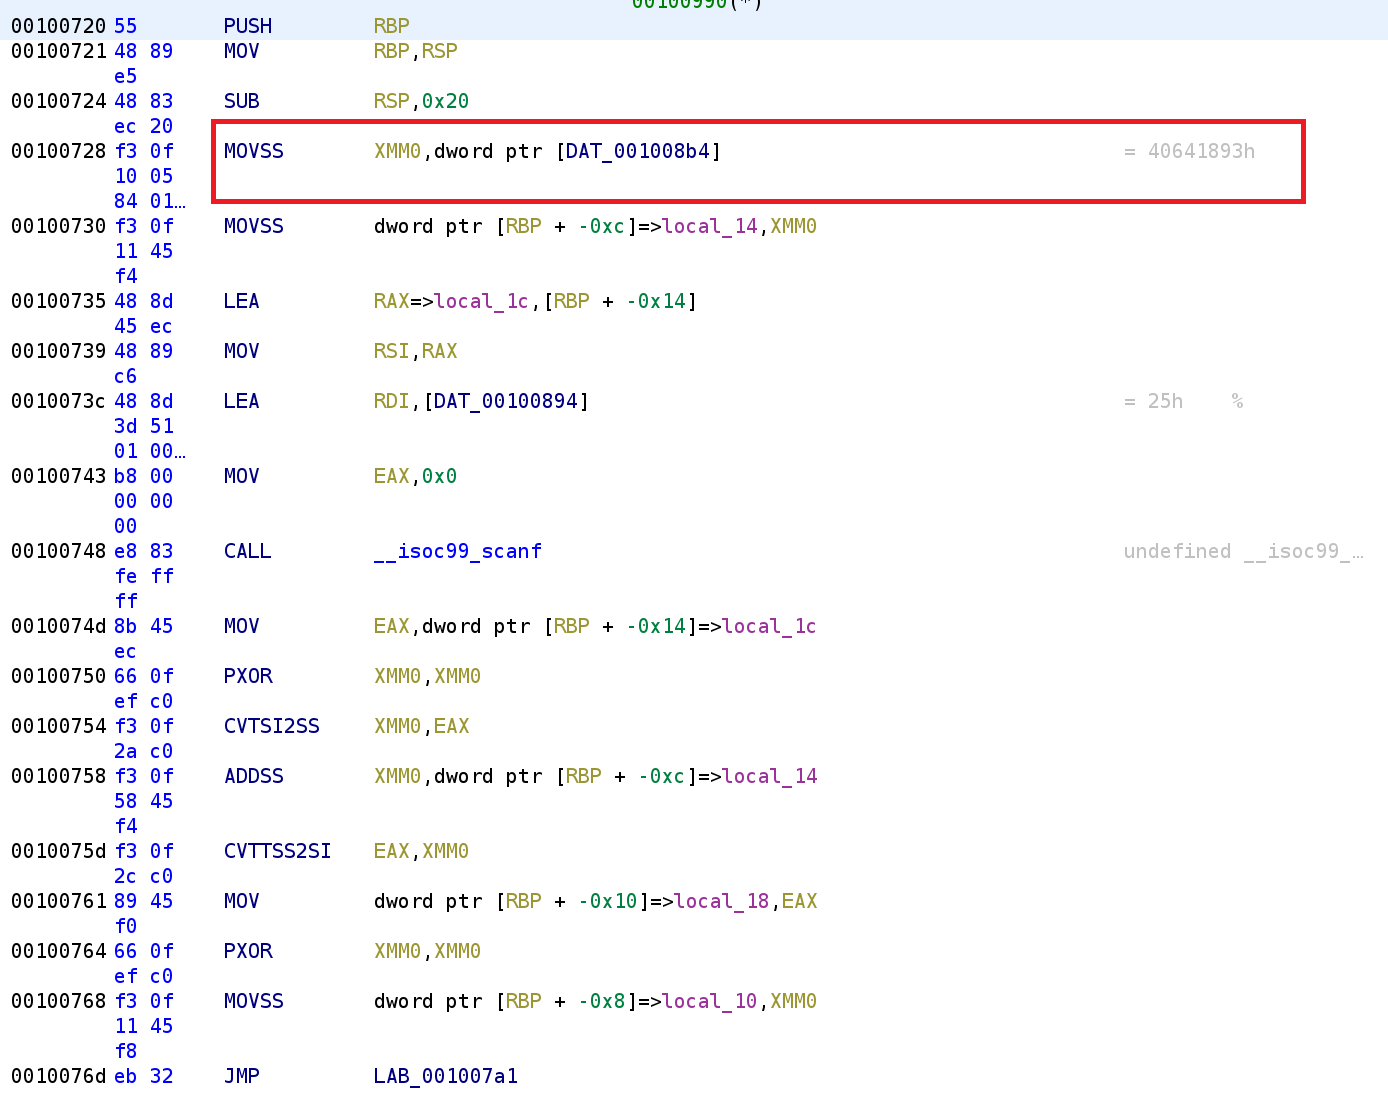
We see the normal function prolog, but the instruction highlighted in red is a special instruction. Additionally, the register used XMM0 is a special register. The XMMn (where n ranges from 0-31) are used to handle floating point numbers. They have other uses as well, but we are primarily concerned with this particular use case. We see the highlighted instruction takes a value from memory and stores it in the XMM0 register. We can see this value is 0x40641893. While this looks like a huge number, we have to keep in mind that this is going into a floating point register. We can tell Ghidra to interpret this has a hex value. First, double-click on the DAT_001008B4.

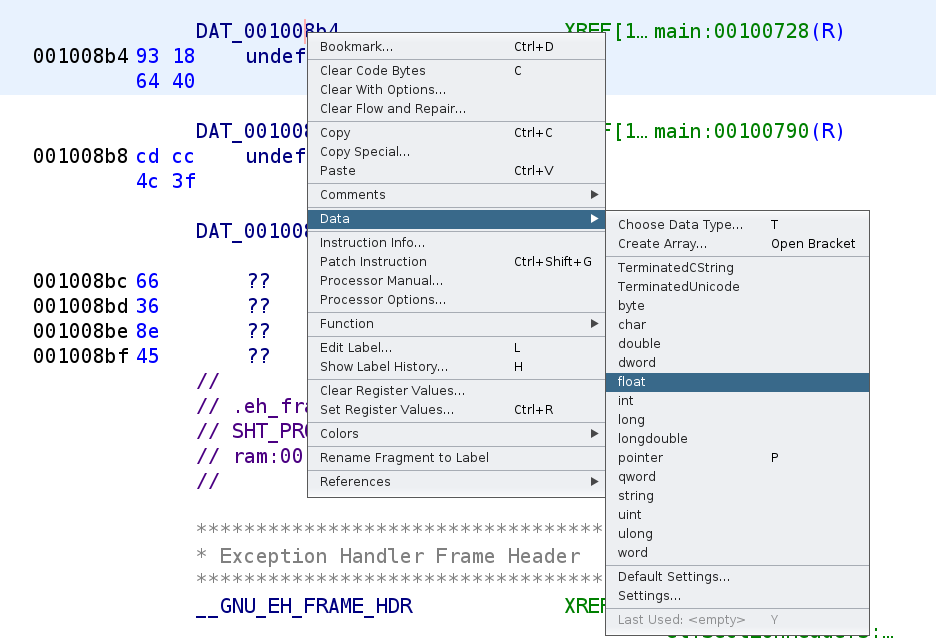
We see that Ghidra labels this as undefined and therefore the hex value stored there are interpreted as simply hex. Since we know this is going to be a floating point number, we can change the type to float. Right-click on the variable and go to Data and select float as depicted in the image below.
After you do that you'll notice the value is updated to reflect the floating point value.

Great! We changed the data type and now we know the value that gets stored in the XMM0 register. Let's go back and continue our analysis.
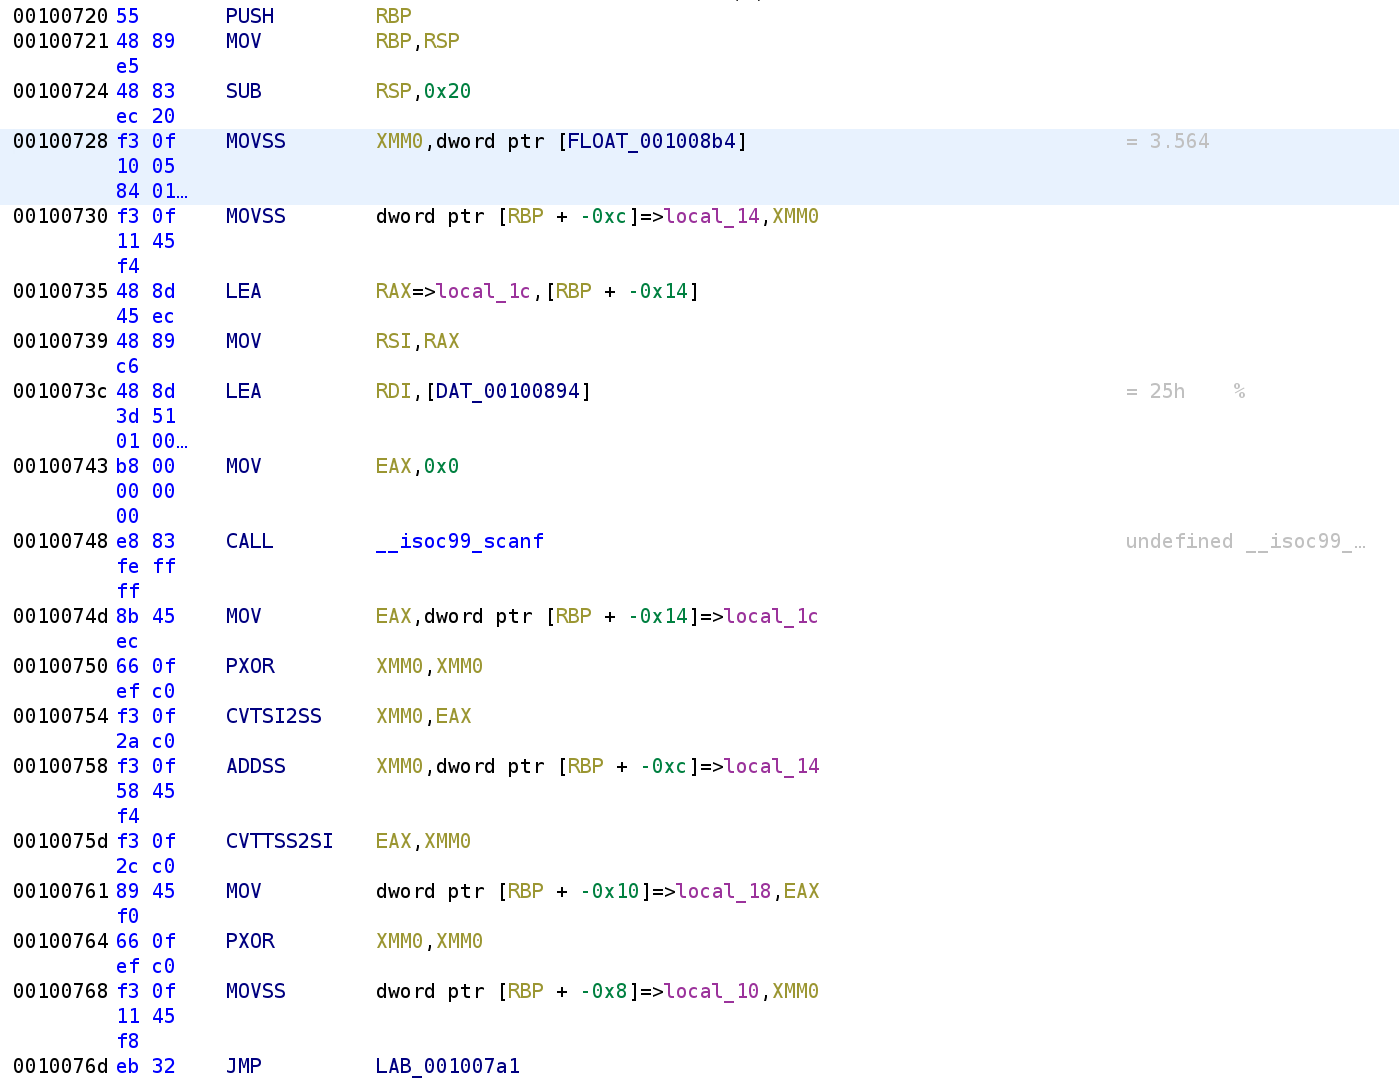
Ok we see that 3.564 gets stored in the local_14 variable. In usual Jaybailey216 fashion, let's rename this variable to is_3.564. We then see, another variable local_1c is being passed to scanf along with what looks like is a format specifier. Let's double click on DAT_00100894 to see what format specifier is being specified lol.

We see that the format specifier is %d so local_1c is going to hold a decimal number that is NOT a floating point number. Keep this in mind! Additionally, let's rename local_1c to user_input.
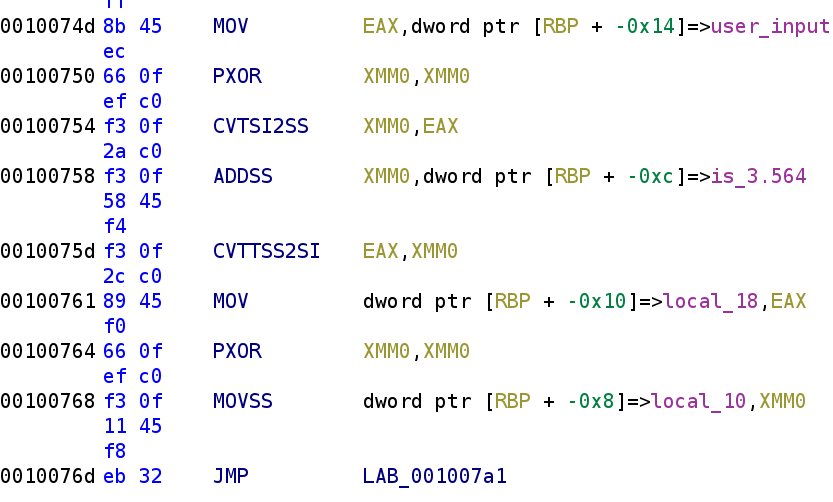
Alright, after we grab the user input, we store that in the EAX register. We then see another instruction we've never seen before, but you might be able to guess what it's doing. PXOR will, as you might have guessed, XOR two XMMN registers. The instruction after that is also foreign and quite frankly pretty gross! CVTSI2SS converts a non-floating point number to a floating point number. This instruction stands for convert signed integer to scalar single precision floating point value. I know that's a mouthful! So, if we typed in the number 5, this will convert that to a floating point number (5.0) and store that in the XMM0 register. We then see the ADDSS instruction. This instruction seems pretty self-explanatory, it adds two floating point values. The result is stored in the XMM0 register. So, this will add our user input and 3.564. So, to keep track of this, XMM0 now contains 8.564, assuming we typed in 5. The next instruction CVTTSS2SI, does the exact opposite as the other instruction, it takes a floating point number and converts it to a signed integer. So, EAX will hold 8. This result is then stored in local_18. Another thing to keep in mind, local_18 is NOT a floating point number. Let's go ahead and rename local_18 to sum. Finally, we see the XMM0 registers are zeroed out again, then we see local_10 being assigned to XMM0 followed by an unconditional jump. Let's go ahead and rename local_10 to i. Also, keep in mind that i is a floating point number and not an integer.
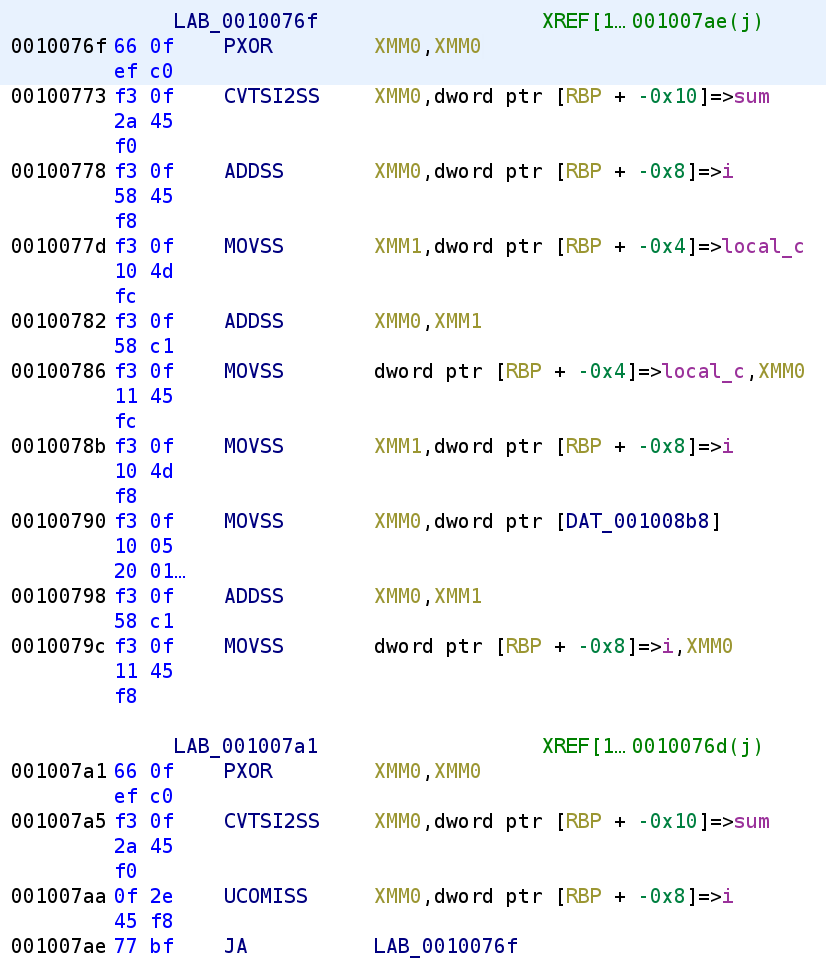
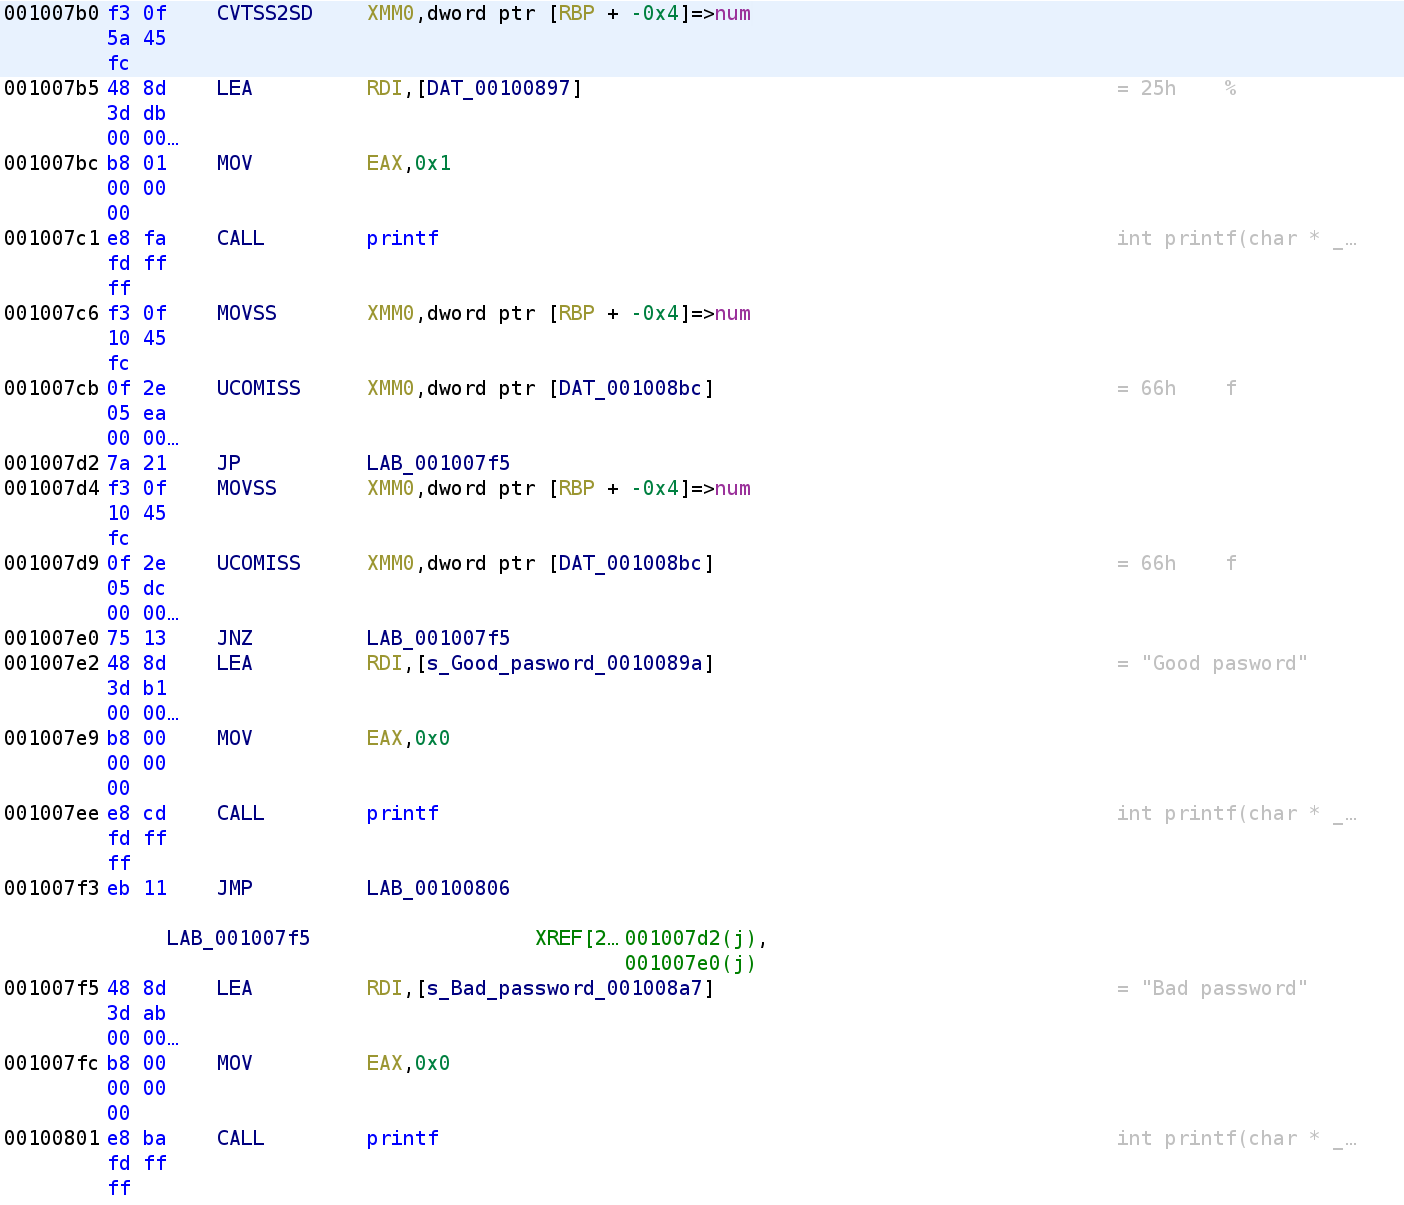
The above code is a while loop. We see that i is compared to sum. The UCOMISS instruction compares two single precision floating-point values. This instruction sets the EFLAGS register depending on the result of the comparison. If either of the operands is a NaN. This instruction sets the following flags: overflow OF, zero flag ZF, and parity flag PF. If the destination operand is greater than the source operand, none of the flags are set. This means, ZF, OF, and PF will all be zero. If the destination is less than the source, the CF register is set. If they are equal, the ZF flag is set. The JA instruction is jump if above, which checks the CF and ZF flags are not set. If they aren't set than we perform the jump. Now, let's take a look at the contents of the loop, starting at address 0x0010076F. We see the XMM0 register is zeroed out. The sum is placed in the XMM0 register and we see i is added to sum. Recall, that i is a floating point number so this will preserve the precision. So, continuing our example where we input 5, sum will be 8.564, and after the ADDSS instruction, the XMM0 register will hold 8.564, because at this point i is still 0. We then see see another variable, local_c is stored in the XMM1 register and this is then added to XMM0. To put it simply, this is local_c + sum + i. We then see XMM0 gets placed in the local_c variable. So, this is equivalent to: local_c = local_c + sum + i. Now we see another instruction involving a different DAT memory address. Let's go ahead and change the type just as we did before.
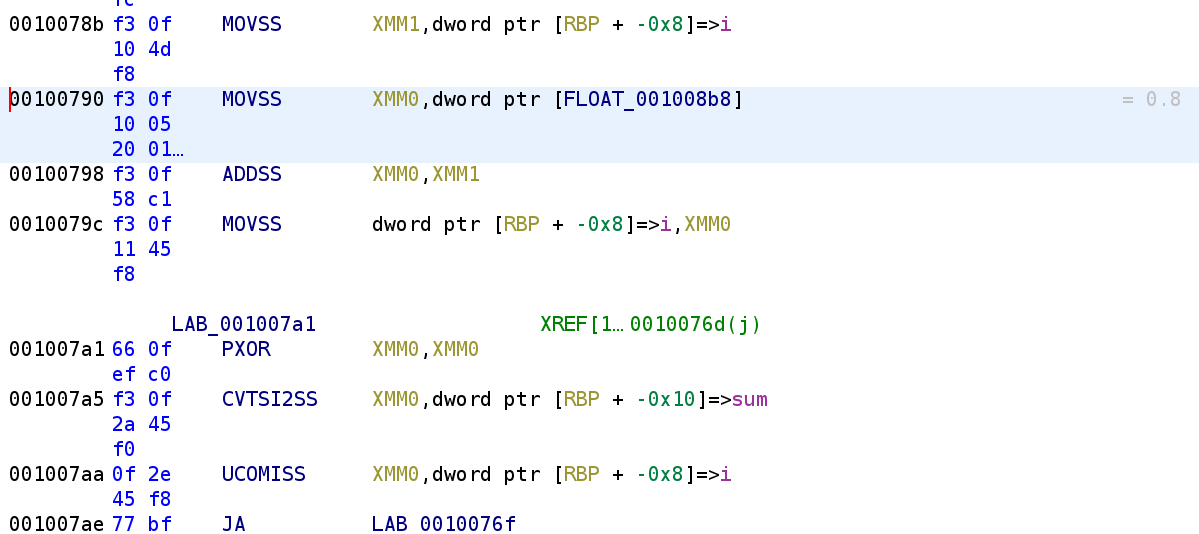
Now it's a little clearer what's going on. The variable i is going to be incremented by 0.8 in this loop. This explains why i is being used as a floating point number. I know that was quite a lot up there so let's go ahead and write out the equivalent C code.
while(sum > i)
{
	num = sum + i + num;
    i += .8
}
I renamed local_c to num but that is all the above code is doing.
Alright we're almost finished. First, the variable, num is passed to the printf function. We can't see what the format specifier is so let's use the same method as earlier to get the format specifier.

This time, we see a floating point format specifier being used so this is going to print out the floating point value. We then see that num is compared to another value that appears to be a floating point value. Let's convert this to a float so we can see the value num is being compared against.

Sweet, so, num is compared to 4550.8. So, this means that we have to provide a number that when it goes through that loop, the sum will be equal to 4550.8. Ok easy enough right? Well, I wasn't able to figure out a clever way get this value so I bruteforced it lol. I simply provided a few numbers until I eventually got the number I wanted. What's great is this binary shows you the out the result of the calculation so you can see how far or close you are to getting the magic value.
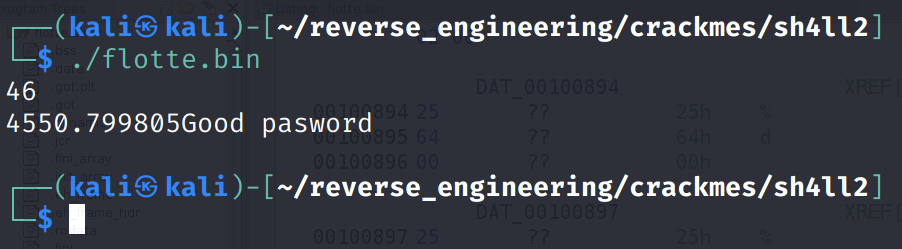
I eventually came up with 46 which satisfies the equation. I have no idea why 46 is the magic number I just know that 46 is the only number that works. If you know why 46 works I would love to know. Anyway you can see my decompiled code below. Hopefully this helps clear up any confusion in this post!
float num1_3.564 = 3.564
int user_input
scanf("%d", &user_input) // 5
int result
result = num1_3.564 + (float)user_input // 5.0 + 3.564 = 8
float i = 0
while(result > i)
{
        num = result + i + num
        i += .8
}
printf("%f", num)
if(num == 4550.8)
{
        printf("Good password")
        return 0;
}
printf("Bad password")
return 0;
In this particular pseudo.c I annotated the variables with types to ensure we remember which variables are integers and which are floats.
Conclusion
Alright that's all there is for this challenge. This challenge was pretty simple but if you've never dealt with the special instructions and registers it can be a little confusing. Additionally, if you weren't aware of that little Ghidra trick, it can be a little misleading what the values of the registers and variables hold. I hope you all enjoyed this and learned something from this tutorial. If you have any questions feel free to hit me up on Twitter, Instagram, or Discord: jaybailey216#6540. If you have a challenge you want me to try next, let me know and I'll give it a shot! I'll see you all next time!
Peace out! ✌🏾